
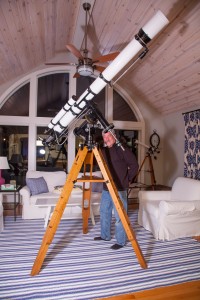
Several years ago an opportunity availed itself to me to purchase a 510 Unitron telescope, I jumped at the chance to own one. I traveled to Fort Worth Texas to meet up with the owner Jim Craft. Jim acquired the telescope 34 years ago from the main gallery of a planetarium and observatory in Texas. The planetarium was making room, strangely enough, to put in a gift shop.
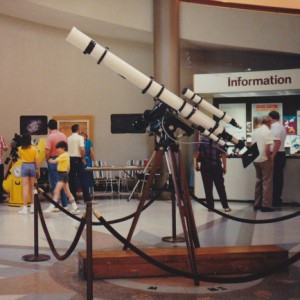
The telescope did not see much use and was last brought out and setup by Jim to watch the comet Shoemaker-Levy 9 plummet into the planet Jupiter. The telescope was well cared for, but the mount was never taken apart and cleaned and re-greased by Jim. The many years took its toll on the grease and it gradually turned into a sticky varnish like substance. I noticed the meshing between the worm and ring gear felt very soft. By the time the action moved further down to the bevel gear transmission, the resistance was overcoming what accuracy and performance this scope should have had.
The mount needed a good going over. As with many of my other telescope projects, I started cleaning exterior parts on the mount and re-greasing gears and worms only to find out something internal was hanging up. By the end of the day, I had the entire mount in pieces and it turned into a major project.
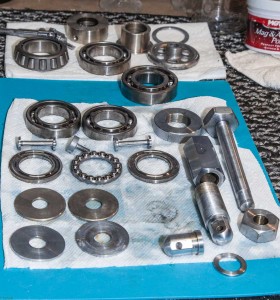
The main parts of the Unitron mount come apart quite easily. Documenting the entire process with photos I’ve learned is a must. I try to keep parts in the order as they go together photographing them in this state. It also helps to organize the many screws and small parts either in a divided container or small baggies.
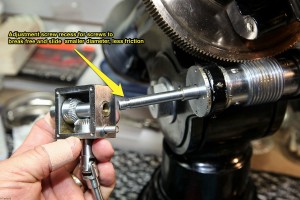
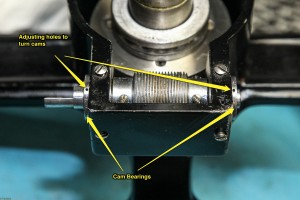
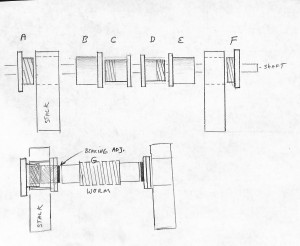
With only 5 or 6 of this size Unitron in existence, there is very little information on the internet about the 5” mount and I quickly realized I was treading new waters. Persistence and patience as the parts came off; I knew I needed to acquire an understanding of how things worked so it could be correctly put back together again. I also realized that in its early life, someone did make an effort to adjust the worm gear and it’s cams and bearings and I began questioning if it was assembled correctly. The cams, internal worm bearings and the surrounding parts were binding and it just didn’t make sense to me. In order to take apart and re-assemble to try a new configuration, many other parts are affected. Through trial and error and by assembling and disassembling the mount, I finally achieved the correct configuration. I made this drawing of the parts involved in the worm assembly. There are 4 ball bearings (2 on each side) and 4 slip bearings with cam that allows for adjustment. Turning the outside slip-bearing cam moves the worm nearer or further away from the main ring gear. It all made sense now. It also was turning very freely and easily as it was designed to do. Whoever had assembled it last had put it together wrong.
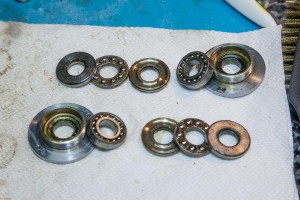
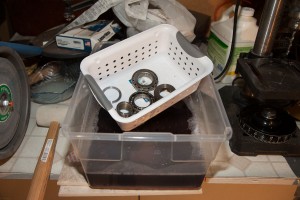
I use a degreaser for all metal parts that are not painted. I have a tub with a strainer to put the parts in sometimes leaving them in the solution overnight. The painted parts were cleaned with mild cleaners. Over the years most of the mounts painted parts had become sticky with old grease residue. Never use degreaser on painted parts as it will quickly soften the old black paint and leave a dull finish. I soaked the main bearings and then carefully used compressed air to blow out the rollers. The easiest way to re-grease them is the same way you pack a trailer bearing. Cup your hand and rub as much grease into the bearing as you can and clean off the outside when you are finished. I use Superlube synthetic grease. Assembling the main bearings and RA shaft made me realize how much the old dirty grease can affect performance. The RA travelled very smoothly now.
The Unitron mount uses a small transmissions with bevel gears to produce a right angle drive to power the worm gear. The gears were literally stuck together. I did not have to take them apart completely as the entire transmission when into the degreasing tub. I did notice a very interesting way that the designer used to protect the main worm and ring gear from damaging themselves if they got jammed. On the end of the transmission, the shaft is machined with a small radius. A setscrew tightens on the small shaft and becomes the weak link if something gets stuck. It will break free first allowing the shaft to slip freely and stop sending the power to the gears.
Unitron used a nickel-plating for their silver or chrome looking parts. A surveyor told me once that transits in the early 1900’s were also often painted to cover up the inferior metal underneath. The inferior metal used? Well, brass of course. The shaft used to support the solar plates on my telescope was badly pitted and dis-colored. I sanded the damaged nickel coating completely off revealing a wonderful shiny brass finish, clearly inferior, but oh so nice. It may not be historically correct, but it almost makes me want to remove all the nickel coatings!
The restoration was a rewarding undertaking. The mount performs very well now and is now operating as it did some 43 years ago. It may even be better. The mount is a simple design but well thought out. I would not fear taking one of these apart again nor should you. Inferior grease or just plain aging grease accounts for most problems of old mounts. Once cleaned, they should last and perform well for many years.
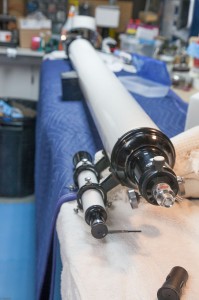
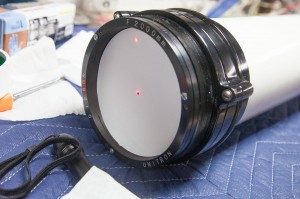
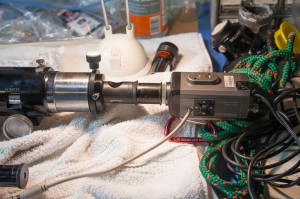
The OTA seemed to be in good shape but I notice that the focuser and lens cell were loose in the tube. That looseness will throw off the collimation. Taking the small screws out of the cell and focuser and cleaning the threads a bit and reinserting the screws made the difference. I used a Howie Glatter laser to center a dot on the front lens from the focuser and a collimation tool to adjust the lens cell. Collimating a telescope this long is a two person job but since my wife was not around, I used a video camera to view on the focuser end while I adjusted the three screws on the lens cell. Later I had my wife help when it was on the tripod and under dark skies. On a scope this long just being tilted up can cause the collimation to change.
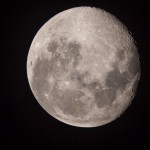
The 5” Unitron performs well as you would expect. I’m impressed that this Unitron has very little chromatic aberration or color fringe when viewing bright objects like the moon. The moon viewed through the Unitron was spectacular. Craters were distinct and clear and with an adapter to use some of my modern eyepieces, view were almost three dimensional. Once I have a shaft made for the electric drive motor (the one that came with it was snapped. You guessed it, bad grease), I will be able to use the Unitron with my cameras for some dark sky photography and video photography of some of the planets.


If you would like to read the original detailed thread for this restoration, follow this link to CloudyNights.com under the “Classic telescopes” section.
http://www.cloudynights.com/topic/453088-5-craft-unitron-510-restore-turk/
I would like to thank Dave for his wonderful dedication to this website. He is preserving the history of these very recognizable and famous telescopes.
Tom Terleski, November 2014